How does your media product represent particular social groups?
The characters in the narrative of my film opening represent a middle class, white social group, due to them being this class, out of character. Due to them being this class makes them act in this way, as if they were them. I decided that the characters of my opening would be middle class, so the narrative of my film would fit, and make sense. Therefore having actors that are middle class, would help them to represent these social groups.
Due to my opening having both a male and female characters, my product represents both of these genders. The male character is represented as the stereotypical dominant male leader for most of the film. As they get to the cabin in the narrative, the power swaps over to the female character. This is shown through the narrative, but also the technical aspects of the opening. The use of camera work and angles of the camera, connotes that she gets the power in this scene due to her being higher up than him, and the camera looking up at the her. This is also shown when the camera looks down on to the male character, as the reverse shot is shown.
Both of my characters in my opening are middle aged, due to them being this age stereo typically they show maturity. The female character shows maturity when she wants to go back to the car as the cabin is all smashed up, as she thinks it is unsafe. The male character then persuades her to not go back, showing immaturity, which is stereotypical, of the male mid-life crisis, but also the personality of the character.
These representations then link back to the type of audience that would watch the film, as viewers will be able to relate to the characters. When I researched the primary and secondary audiences for my genre of film, in the planning, the typical viewer is both male and female, younger viewers ranging from sixteen to late thirties, and mainly middle class. This is the typical profile of the main audience. The characters in the film are in a similar age group and class, therefore they could relate to the characters in the film.
The uses and gratifications theory tells us why we watch films. This can be applied to why the audience watches the film. Viewers watch films to identify with the characters, which can be role models for them. Viewers also watch films for entertainment, which helps them to escape, and also help them to forget about their issues in real life temporarily. With the combination of the identification and entertainment, viewers can reach escapism, from their real lives, whilst relating to the characters, which represent a more exciting life, that is similar to the audiences.
Linking back to identification, where the viewer relates with the character, due to them being similar, can help the viewer feel like they are in this situation.
31/03/2017
Evaluation - The Final Cut
I think that the final cut of the opening turned out well. The camerawork works really well for the opening, especially the variety of shots, using steady shots on the tripod and handheld shots to represent the view of the stalker. The variety of shot lengths and types is also a strength of the opening, as it presents long sweeping slow pans whilst the narrative is all calm, and switches the variety so the technical aspects of the footage, fits with the narrative, therefore applying to typical horror conventions.
I also think that sound in the film was done well. the use soundtrack or music really help to make the film much better. The syncing of the music with the visuals, is also done well as disturbing noises come up at certain points in the film, which helps to add to the whole opening. The dialogue in the opening was also good, especially when it was re-recorded and placed onto of the footage.
The use of editing was a strength of the final cut as I tried to keep in mind what style of editing typical horror films use. This then helped to apply to these conventions. When editing the footage, to add effects to it, I also kept in mind the typical horror colouring of the lighting. I then made the shots more blue using a tint. I think that this helped the viewer fell like they are watching a horror film.
I think that Mise-En-Scene and the narrative could've been improved, if I had more time, or I would have re-done the film, as the narrative could be stronger and more conventional. Mise-En-Scene in the film was very minimal, due to most of the location and footage being filmed outside, in the woods. Things like costume were thought about, but not stressed as much as camerawork, editing and sound. This would be something i would improve, if I were to make another film.
30/03/2017
Evaluation - Conventions
In what ways does your media product use, develop or challenge forms and conventions of real media products?
Some of the points covered in this video
My film opening follows lots of typical horror genre conventions. The setting of the film is in an isolated, abandoned and dark setting which is typical for lots of existing horror films. Due to the location being isolated helps the viewer to feel that they really are in trouble when it goes wrong.
The characters in the opening also follow typical character conventions of the horror genre. Vladimir Propp's character theory tells us typical characters in most film. My film applies to this theory due to the character falling into similar categories. The central protagonist of the film is usually a victim or a hero of the film. This is represented by my protagonist being a victim, within the first few scenes in the opening. There is also an innocent female character that gets attacked quite early in the opening. This also follows character conventions as this happens in quite a lot of existing horror films. This supports the idea that she is innocent as she did not want to be there in the first place, due to her actions in the narrative. The villain character is typical of a horror film due to them being an essential piece of the film, so there is obviously this character in my opening. The male character in my opening makes her go to the cabin.
The narrative structure of my opening also follows typical horror conventions, due to the female character being attacked in the opening, being quite soon in the plot of the film. Which also links to horror character conventions. Claude Levi-Strauss' narrative theory tells us that a lot of typical narratives could be reduced down into binary oppositions. In my film openings case, this would be good vs evil. The innocent characters against the stalker (villain) in the woods.
Tzvetan Todorov's narrative theory tells us that films narrative all follow a set of stages. These are the equilibrium, a disruption, recognition of the disruption, solving the disruption and a new equilibrium. Due to my production being only the first few minutes of a film. Only the equilibrium and disruption are covered. But my film still applies to the start of this theory.
Technical aspects of my film opening also apply to typical horror conventions. Things like iconography apply to these conventions. Low-key-lighting helps to create dark scenes which is typical of other horror films. Mise-en-scène was thought about very carefully, the positioning of characters, clothing, etc. One of the shots where the characters walk up a small incline, there is the dark forest on one side and the light open forest on the another. I chose to make the male character to walk on the dark forest side of the path as it connotes that he is making her go to the cabin, which puts her in danger. The female character walking on the light open side of the path, as it connotes innocence.
Camerawork was thought about very carefully when shooting. I included a point of view shot of the female character as she was about to get attacked, by the villain. I also used lots of handheld shots the simulate the fact that something is about to go wrong. These are typical of horror films, therefore applying to technical horror conventions. When the two character were having the conversation about the vandalized cabin, I used high and low angle shots, to emphasize that she holds the power in that scene, and with the combination of over the shoulder shots and the 180 degree rule helps to simulate that a conversation is going on. These types of shots are not only common in the horror genre but in all film.
When I had shot all of the footage for the film, I then added all of the footage to the project in Premiere. I tried to follow specific horror conventions by using minimal cuts between shots and then increasing the pace of cuts as the narrative of the film gets to the attack. This is very common in typical horror films. I also added a tint to the footage, altering the levels and colouring of the shots. I made it so the shots increased in more of a blue tint as the film progresses. This also applies to typical horror conventions.
Sound was a big part of the final cut of the film. I spent a large amount of time on the sound of the film. From the sound effects, dialogue to the music and soundtrack of the film opening. I had to re-record some dialogue, as some of it was unusable. Focusing on sound effects, I added some disturbing sounds, from screeches to high pitch noises. These sounds increased in volume, but also the amount of times they come up. The sound track also contains disturbing sounds to help to apply to typical horror sound conventions.
Overall I think that the film opening turned out well, as I made my film alone, and with limited time, some of the aspects of the film would need to be re-done. Things like the sound would have to be re-done as the microphone lacked quality so i had to remove the noise within audition as best as possible. I had not used this software before, as well which made this a lot harder. Apart from the sound I think that the film opening was done well.
Final Edit
I went back into the edit of my film, looking at all the feedback I got from it. I tweaked some of the sounds, making the film louder as some of the levels were too quiet. I also raised the volume of the music as it was quite quiet in some parts. I then played back the edit and the boost in volume makes the film sound much better as you can hear the dialogue much better.
I also updated and made the second part of the title glitch, using the RGB split and flicker effects in After Effects. I went about the glitch effect in the same way by duplicating the previous composition of the other titles, and changing the text and altering the glitch effect, so the timings of the glitch and colour split are different to the other title. I then placed the composition into the main composition using the motion tracking camera, I then stuck them to the lines in the road, like they were originally. After playing back the first bit of the title sequence, the glitch effect on both titles looks a lot better than just on the first one.
I then altered some of the colouring of the footage. I decided to make the tints on the footage gradually get stronger as the film opening progresses. I raised the opacity between cuts making the opening get more and more blue as the narrative gets to the main attack scene.
Overall, I am happy with the final edit of the film and I think that the sound, editing and camerawork in the opening work really well together. After adding my ident to the start of the film helps to set the mood of the film due to it being dark, cold and the sound on the ident being really atmospheric. I think that the ident helps to make the film look much better.
Overall, I am happy with the final edit of the film and I think that the sound, editing and camerawork in the opening work really well together. After adding my ident to the start of the film helps to set the mood of the film due to it being dark, cold and the sound on the ident being really atmospheric. I think that the ident helps to make the film look much better.
21/03/2017
Creating the Ident
When filming the footage for the ident, I experimented with lots of different pans, shot lengths, shot types and so on. I could then choose out of all of the footage, which would be best for the ident.
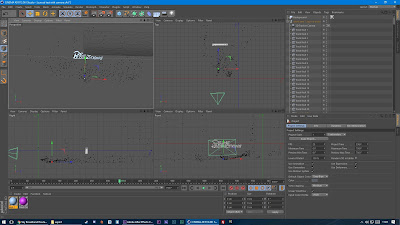 To create the text for the Prime Productions logo, I found a horror style font from the internet, and created a 3D model within Cinema 4D. Within C4D I modelled a title that looks good and that could be used for an ident logo. I then imported the C4D project file into Adobe After Effects, so I could use motion tracking to make the title stay in one spot, as if it was actually there in the footage. Using the built-in Cinema 4D plugin, within After Effects, I could select the renderer of the text, and alter settings of the render using the built in parameters, from the plugin.
 I then hid the 3D text layer and tracked the camera from the footage within after effects. After AE had done its magic, I could then create a 3D solid, where I would want the text to be, and the camera on the timeline. I then created null layers where AE camera tracked, so I could lock the text onto the right point. I then exported the camera and the null layers from AE into a C4D project file, so I could build the text in the right place in the environment. I placed the text in the right place on one of the null layers, altering the rotation, position and scale so the text looks good in the ident. In C4D I could import the footage to a background and add the video as a material. This is so I could sync the text positioning with the footage. After syncing the text, I deleted the background layer, I then re-imported the C4D save back into After Effects so I could combine the 3D object and the footage together. I then textured the logo to a horror style texture so the text looked better.
 I imported the camera and null object layers into Cinema 4D, rather than importing the text straight into it, so the camera would move around the text. This makes the text look like it is in the scene and makes it look more realistic. If I just imported the 3D text into after effects with the camera looking straight at the text, it would look unusual as the text would be looking at the camera all the time. By exporting the camera into C4D I could import the save into AE so it looks like the camera moves around the text.
After sorting out the 3D text, and the motion tracking. In After Effects I used the colour correction effect, to make the footage have a blue tinge to it. This follows the typical horror conventions, making the ident relate to the genre, the setting and the narrative of the film. Using adjustment layers I could then apply effects to the whole scene, making the ident look a lot better.
 I then masked the trees that come in front of the camera so I could hide the text behind them as the camera pans past. This is so the text does not come on top of the trees making the difference in foreground and background non existent. I then animated the positioning of the masks as they need to follow the trees as they move past. I could have done this using the built in motion tracking but thought it would be quicker to just key-frame the positioning of the masks. I key-framed the masks instead of motion tracking as the trees that come in front of the camera moved past quickly and the it is quite a smooth movement.
 Using colour correction, altering the levels and contrast of the scene, I could control how dark, or light I wanted the scene to be. I made the footage more blue to apply to the conventions and made the forest much darker than the original, to set the mood of the clip.
This made the setting look much more atmospheric and helps for it to apply to horror genre conventions.

I then added a smoke effect to the scene, using stock footage. I altered the blending options so the original footage would show through the grey background. I then RAM previewed the footage, but I did not like that the smoke effect was viable when the tree was moving past, the camera.
 I then masked the tree key-framing the position of the mask so it would move with the tree. Basically like the other mask to hide the Prime Productions logo. I then inverted the mask so the footage would only play outside of the mask. I then previewed the compositions again, and found that I did not like the fact that the smoke effect was there before the wipe of the tree. I then altered the positioning of the mask so it covered the other section before the wipe of the tree. This then make it so the smoke only appeared after the tree had wiped past. I then feathered the mask so it would blend and fade out on the edges so you could not just see a distinct line, which looks unnatural.
Through out the process of making the ident I experimented with different textures for the Prime Productions logo. I prefer the red metallic type look to the logo. All the previous textures I used were supposedly plastic but when I changed the text to a metal, it thought that the dull metallic texture looked a lot better.

 I then made a new composition and created particles with the trap-code particular plugin. I could then select certain presets in the options interface. After making particles that would be appropriate for the scene by setting the fade in/out, sizes, etc, I altered the parameters on the plugin to perfect them. I then added this composition onto the main composition with the logo and footage. I previewed the composition and realised that did not look to good as the particles just moved around which looked like they were on the lens of the camera. I then used the motion tracking camera from the text and made the composition layer 3D. I then moved the position of the composition so the particles looked like they were in the environment. I had the same issue with the camera passing the tree, as it looked weird when the particles moved onto of the tree, which destroyed the perception of the 3D environment. I then masked the tree on this layer and inverted the mask so the particles would show everywhere but the mask. I then previewed the main composition again and making the layer 3D made it look a lot better. I then reduced the opacity, and made the particles look much more blurry, using the plugin. The particles moved within the environment and made the ident look a lot better, after adding this effect.


 I then went onto making the sound for the ident. I wanted a mysterious ambient sound in the background to connote the horror genre, I also added a deep bass effect when the text entered the screen. I rendered out the composition from after effects and imported it into audition so I could link the sounds with the time things happen in the visuals on screen. I then altered the levels, volume and changed the pitch of the tracks. I also added a glitchy type sound when the text glitches, and flickers.
I then exported the audio to Premiere and added the footage. I then added a colour correction to make the footage look more blue which applies to typical horror conventions and rendered the final ident.
 To create the text for the Prime Productions logo, I found a horror style font from the internet, and created a 3D model within Cinema 4D. Within C4D I modelled a title that looks good and that could be used for an ident logo. I then imported the C4D project file into Adobe After Effects, so I could use motion tracking to make the title stay in one spot, as if it was actually there in the footage. Using the built-in Cinema 4D plugin, within After Effects, I could select the renderer of the text, and alter settings of the render using the built in parameters, from the plugin.
 I then hid the 3D text layer and tracked the camera from the footage within after effects. After AE had done its magic, I could then create a 3D solid, where I would want the text to be, and the camera on the timeline. I then created null layers where AE camera tracked, so I could lock the text onto the right point. I then exported the camera and the null layers from AE into a C4D project file, so I could build the text in the right place in the environment. I placed the text in the right place on one of the null layers, altering the rotation, position and scale so the text looks good in the ident. In C4D I could import the footage to a background and add the video as a material. This is so I could sync the text positioning with the footage. After syncing the text, I deleted the background layer, I then re-imported the C4D save back into After Effects so I could combine the 3D object and the footage together. I then textured the logo to a horror style texture so the text looked better.
After sorting out the 3D text, and the motion tracking. In After Effects I used the colour correction effect, to make the footage have a blue tinge to it. This follows the typical horror conventions, making the ident relate to the genre, the setting and the narrative of the film. Using adjustment layers I could then apply effects to the whole scene, making the ident look a lot better.


This made the setting look much more atmospheric and helps for it to apply to horror genre conventions.

I then added a smoke effect to the scene, using stock footage. I altered the blending options so the original footage would show through the grey background. I then RAM previewed the footage, but I did not like that the smoke effect was viable when the tree was moving past, the camera.

Through out the process of making the ident I experimented with different textures for the Prime Productions logo. I prefer the red metallic type look to the logo. All the previous textures I used were supposedly plastic but when I changed the text to a metal, it thought that the dull metallic texture looked a lot better.


 I then went onto making the sound for the ident. I wanted a mysterious ambient sound in the background to connote the horror genre, I also added a deep bass effect when the text entered the screen. I rendered out the composition from after effects and imported it into audition so I could link the sounds with the time things happen in the visuals on screen. I then altered the levels, volume and changed the pitch of the tracks. I also added a glitchy type sound when the text glitches, and flickers.
I then exported the audio to Premiere and added the footage. I then added a colour correction to make the footage look more blue which applies to typical horror conventions and rendered the final ident.
10/03/2017
Title Sequences


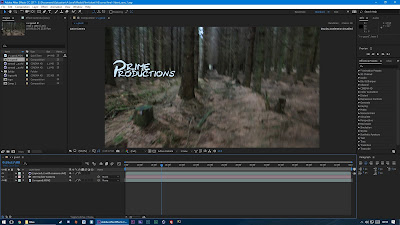
To create the titles for my film, I used a simple thin font style like the hunger film font, I then had the idea of motion tracking the titles, to the footage from the film. I created a new composition for the titles themselves as I wanted to add effects to them. To make the look more impressive and so they related to the genre, I make a RGB split and glitch for the text, so the text glitches in and out of the shot. I then made the colouring split to a light blue type colour, rather than a red or green, so it applies to the genre colour conventions of horror. The titles then flicker and glitch randomly.


I then imported the composition into the motion tracked footage composition, made the layer 3D and placed the text in the right place. I added a fade in and out, for the text, making it look better.

I decided to use different compositions and imported them into the other compositions, to help keep my timeline clean. The fuzzy and RGB split effect to the titles was all done in a separate composition to keep the other timeline clean. I then just imported the compositions with the footage, and I could then just alter the settings and parameters in that composition and it would update the text in all if the other compositions.
I then went onto making the title of the film for the end of the opening, recreating a similar title sequence to the Evil Dead title sequence, I chose a font for the text of the title and imported it into After Effects. I then added the roughen edges effect to the text so I could make the text look like it was dissolving away. Using key-frames I made the text disintegrate over time. I converted them to the easy-ease type of key-frame and using the graph editor in AE I could then alter the speed between the two key-frames so the effect would change at a different rate over the frames in the scene rather than one standard speed, across the time.


 I then added the gradient ramp effect in AE so the text would fade out on the edges of the text, making the title look much better, especially for the horror genre. I altered the settings on the effect, changing colours, the positioning of the gradient, the direction of the fade so the text fade would look better. I then key-framed the opacity of the text so the text would fade in and out of the black screen.
Soundtrack, Dialogue re-recording & Editing
 After all of the feedback from the rough cut, I started to go back and edit the footage to alter the edit. As most of the sound in the footage was not usable, I have had to re-record the characters dialogue. I have then had to alter the levels of the audio so the sound is not too loud, for the shots. When I exported the dialogue and added into the edit in Adobe Premiere Pro, I realised that the sound needs other background noises and things like wind from the original clip to sound believable. Without these background noises the audio sounds too much like it was recorded some where else, like a voice-over, which is not what I want the viewer to assume. Using the audio from the original footage I have placed background noise behind the dialogue, which then makes the audio sound more believable. I then altered the pitch and levels of the sound to fit the environment for the film. I then added effects to the audio so they sounded like audio was not re-recorded.
Some of the audio from the footage, was fine to use within the edit, but there were some pops and cracks in the audio and other background noises which would distract the viewer. I then ripped the audio from the footage in Adobe Media Encoder and imported into Audition. I then altered the levels and removed the pops, by deleting them from the audio waves. Due to the pops only being really short, you can't tell that they were there, and the dialogue is still synced with the visuals.
After re-recording sound of the characters talking, I looked into music for my production. I researched online of typical horror genre conventions of sound and music. I looked at examples of this in other films, to give me inspiration and ideas for my own creation of music.
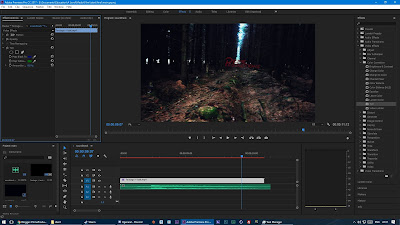
 To build a soundtrack, I downloaded lots of horror sounds (screeches, whirls, etc.) and layered all the sounds together in Adobe Audition to make a horror sound track. Within the program I set some sounds to repeat, creating a base track of howling wind and ambient sounds. I then added screeches on top to build suspense within the music. Then layering more and more tracks and sounds on top of the base sound track to build the music and tension in the music. I then edited some of the individual sound clips to be louder, some quieter, and creating fades (in and out) for the clips of sound. Adding all these effects and layering appropriately, made the music for the film sound really professional, and make the final cut of the film sound much better. The music helps to build to tension for the opening, and make the viewer feel that they could be in this situation. Without the music the film was good but the soundtrack makes the opening much better, especially linking with the visuals. I then edited the soundtrack around the edit of the visuals, to make the sound link and synchronise with the footage onscreen. I rendered the cut and imported it into Adobe Audition, with the program you can then move sounds to sync them with the pace and narrative of the film. After syncing all the sounds to the visuals and exporting the track from Audition, I imported the soundtrack into Premiere.
I have also cut down some of the footage in the cut that was lingering that could potentially cause the viewer to become bored, making the film slow. I have also removed some mistakes in the edit. One of the shots contained a car in the background and when it cut to the next shot it was not there. I resolved this by cutting down the clip so the car was not seen.
Audience Feedback


Another point was made about the different shots and angles of the characters. The audience said that the shot types and the shot reverse shot sequence was good and helped to give the film more narrative for the viewer. The dialogue between the two characters, helped to display the story for the viewer. Composition was something audiences mentioned as they liked the framing of the characters in the conversation. Angles were thought about carefully to give the idea that the female character holds the power in the scene therefore the camera looked up at her and down on her husband.
02/03/2017
Location, Cast, Props, SFX & Mise en scène
Location
 Due to my idea coming from this one location, I have only had this one location in mind, for filming. Because of the dark, thick forest and there being a smashed up abandoned cabin. This makes it a perfect location for a horror film, as the setting being very similar to other horror film settings, therefore applying to horror genre conventions.
The cabin for the film is a perfect location for the narrative of the film. Due to its isolation, atmospheric location makes it perfect for the opening scenes of the film. The image shows the cabin and the caravan opposite all smashed up and broken. When I was taking the photos in the woods, it felt isolated and looked very dark making it perfect for the films plot.
 Due to the forest being quite muddy makes the plot more interesting and more believable that the cabin is difficult to get to. An overcast or misty day, would make the scenes of the film look better as it would make the scenes look a lot darker, making the viewer believe that the two characters are in trouble.
All of the shots for the film will be shot in this location, to keep shooting and scheduling simple, and because there are plenty of potential areas for the different scenes and shots for when the characters walk to the cabin. Due to there being a huge amount of woods, makes it a perfect location for the opening as there are multiple angles and settings for the shots for the film.
Cast and Character, Props, Special Effects
The central protagonist is Aaron the university professor that is doing historical research into the area. His wife Jess has come with him to stay in this isolated cabin where he is doing his research. When she realises that the cabin is all smashed up, she isn't happy.
I think that my cast is good for the roles and characters in the film, because I decided character based on the cast I had available to act in the film. I think that the cast looks believable for the films narrative as the type of character suits the age and culture of the cast.
There will be minimal props in the film as most of the opening consists of the journey to cabin. The male character will be wearing a rucksack, containing equipment for his research. Outdoor clothing will be on the characters as they walk to the cabin. As it is a cold grim day to walk to an isolated cabin.
There will be minimal special effects in the film as the narrative is quite realistic and does not contain any sort of science-fiction characters/aliens etc. The only sorts of effects added onto the footage will be blurs and colour levels, for the shots from the perspectives of the stalker.
Subscribe to:
Comments (Atom)